Showing posts with label Vintage. Show all posts

Sunday, August 19, 2018

Rusty Pipes

   HI!  Happy Day! Today I wanted to Show you all the Pentart Expand Paste and how I used it to rusty up these pipes.  if you dont have Finnabair rust pastes here is another option for you! 


 I started off with gluing down my chipboard with gel meduim


in this picture you see where I took a palette knife and spread on the paste with a thin layer, I mean very this you dont need very much.


Now you heat set it with a heating tool, its bubbles all up and turns white in just seconds! Now look at all that texture it has left me with! perfect for rusty pipes! I also added some stenciling with the Little birdie (Brick wall) 


after the panel was completely dry I started adding my colors this is such a beautiful shade of blue. Electric Blue Cosmic Shimmer Shakers, I sprinkled it on and spritzed it with water. 


after that is  good and dry I dry brushed some black gesso went along some of the edges for a drop shadow and to add some depth.


Now I sprayed the pipes with Little Birdie color splash in (Paprika) PERFECT rusty color spray!


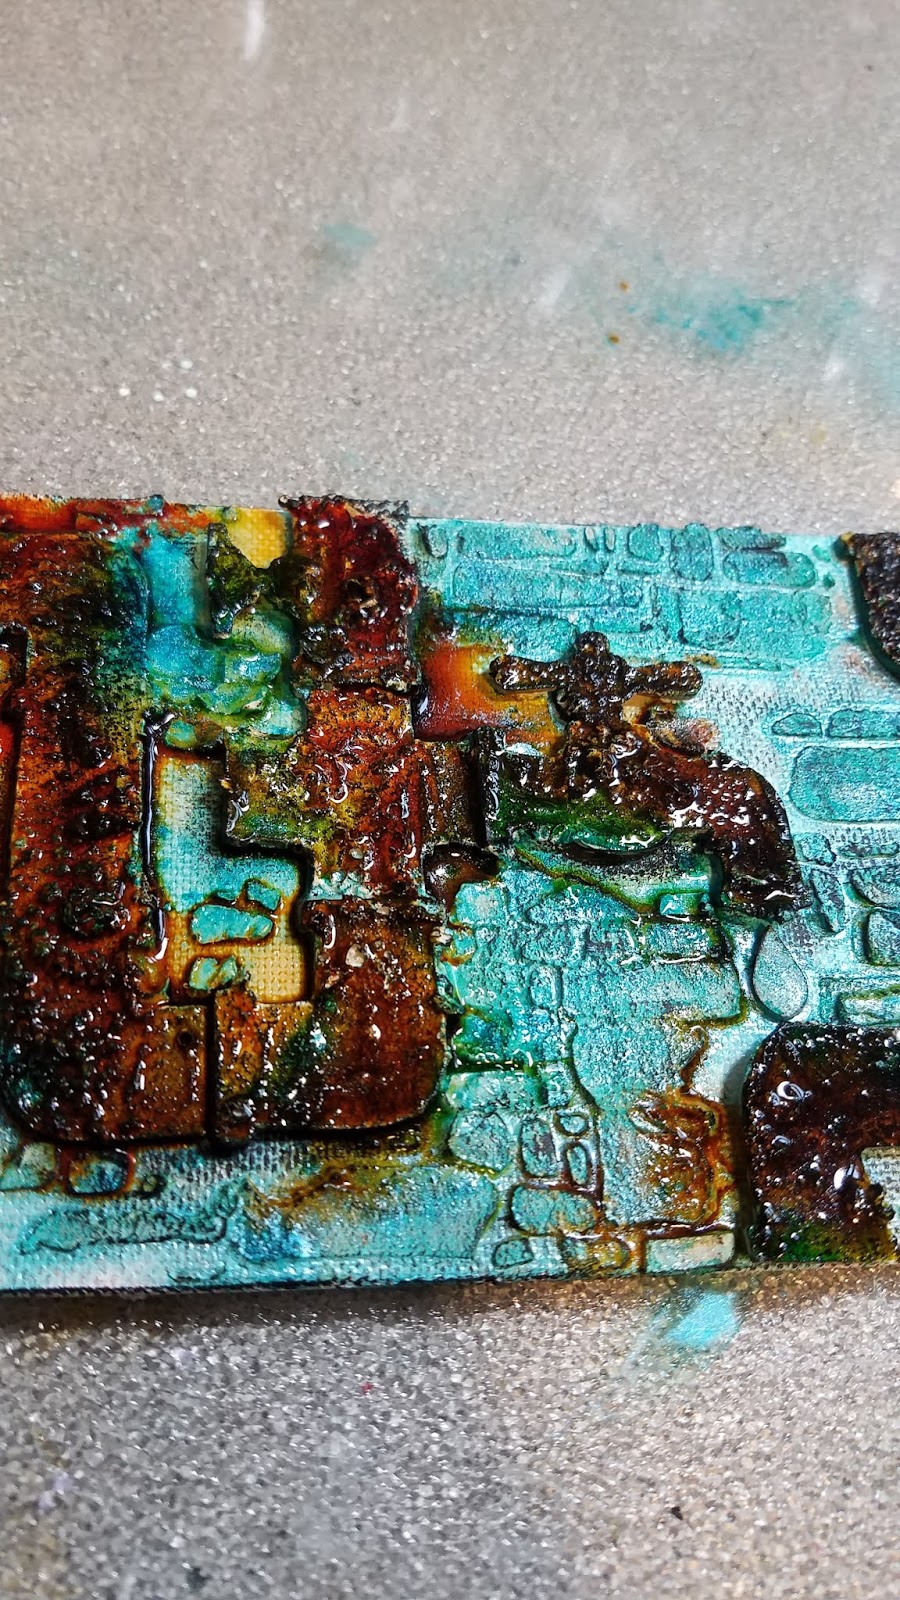
I heat set it again with my heat tool. Loving the spilled spray around the pipes give a great rust look!


 I just adding my finishing touches some Tim Holtz quotes, some finnabair was in (Copper) and inked archival around the edges. Oh and Prills in (Third Place).
XOXO-Nicole


Wednesday, January 3, 2018

Steampunk Styled Top Hat

Steampunk Hat anyone? I haven't posted anything in a while So I'm starting the new year off with a bang!
I found this hat at My local craft store, Snowman Hat? NOT what I'm doing LOL
This hat Is about 6 inches high,and when I'm done the light bulb makes it 10.

                             I cut out some gears using my sizzix machine, I just used old cereal boxes.

I went crazy gluing them all over the whole thing

 Here I used different sized little cups and dipping cups to make the googles, This one I used some old mesh and layered the cups. Using Prima Finnabair Art Basics Heavy Gel medium. Them a heazy spread of Black gesso!

 Here you can see a little better how I layered the cups, I added a chipboard gear and a huge metal gem I used the same heavy gel medium to glue it all together. I used a piece of Velcro for the strap in-between them both.
Now I'm just adding plastic pipes and more gears
I took an old lightbulb and colored it with Tim Holtz Alcohol Ink In Honey Comb


Another layer of Black Gesso

Here I added a strip of foam and added flat gems for the back strap to the goggles

I added more metal and glued the light bulb to the top of the pipe.
And Now its time to bring this baby to life! the only coloring on this whole hat are these little four waxes! powerful little things and I adore them! Prima Finnabair Art Alchemy Metallique wax! I used Vintage gold,Bronze age,Brushed Iron and Rich Copper!


 I also added in Emerald Creek Factured Ice embossing powder into this goggle eye, It really gave a blue effect I was looking for!


This Clock piece on top I poured resin in a fantastic Stamperia mould to make


Okay I went a little Picture overboard! 
Items I used and links where they can be found below.

Store Link so you can just browse around
^^^^^^^^^^^^^^


Monday, November 13, 2017

Time Flies Etcetera Tag

          Hello! Happy Monday! Today I'm Showing you how I made A Tim Holtz ETCETERA tag
I love these Tags!
I used the Ahead of or Time stamps set from Visible Image!
I started off with a nice layer of white crackle paste around the edges
set it aside so it can dry some
Now I covered my Tag with tim holtz papers Dapper and lost and found,distressed the edges with a pair of scissors and added some dry wall tape I got from my local harware store.
More paper and more distressing, I also added a layer oc cheese clothe.
Here are my stamped images, I stamped on white paper embossed with black,and used Tim Holtz distress ink in Vintage Photo .
more layeres, cheese clothe,lacey ribbon more Tim Holtz paper.
Here I start to assemble, I stamped my tag with the same stamp and layed my fussy cut image on top with foam tape, I also used some Instant coffee to drip on the tag for a vintage old look.
I took these gold wings and brushed on the bronzed age wax from finnabair, I just adore these waxes! I use them whenever I have the chance! This picture shows the wing on the right with the wax and the wing on the left without.
Here I have glued down my wings using heavy gel, and am attaching the vortex clock with foam tape. you can see were I used the little bird stamp from this set on the top, It will align with the clock once attached.
Here I embossed some cogs and gears with metallic embossing powder
adding bulap ribbon and some white splashes with watered down gesso, Its all done! I hope you like my tag! Ill have some links below on where to find some of these products! 


Deep Sea Diver Gear

Deep Sea Diver Gear With Crafting On A Budget (Mai Larsen) I Got the Stamperia Sea world paper from Crafting on a budget I started by Cuttin...